Selenium Mastery in Java: Step-by-Step Guide

When it comes to automating the testing of web applications, one tool stands out above the rest: Selenium. With its robust and versatile features, Selenium has become a cornerstone in the world of DevOps tools. However, selecting the right tool is just the beginning – choosing the appropriate programming language is equally important. This is where Java steps in to save the day. In this blog post, we’ll delve into everything you need to know about leveraging Selenium with Java.
What is Selenium?
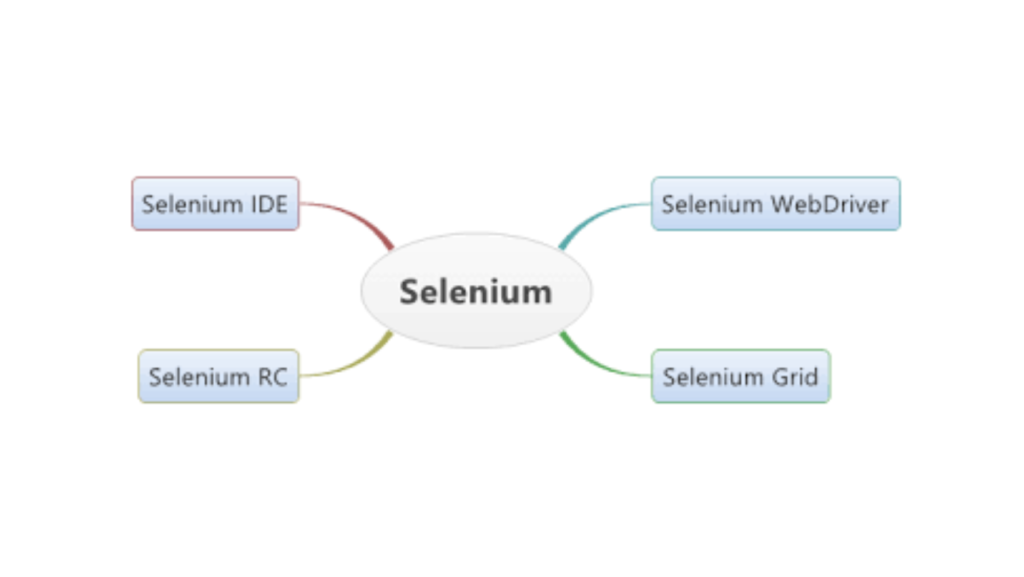
Selenium is an open-source framework used for automating the testing of web applications. It allows developers to write test scripts in multiple programming languages and run them across various browsers and platforms. Selenium consists of four main components: Selenium IDE, Selenium WebDriver, Selenium Grid, and Selenium Remote Control (RC). These components offer features for recording and playback of test scripts, automating web browsers, executing tests in parallel across multiple machines and browsers, and more. Overall, Selenium is widely regarded as one of the most powerful and versatile tools for web application testing.
One of Selenium’s distinguishing features is its suite-based structure. Rather than being a single tool, Selenium comprises four distinct components, each offering its own unique capabilities:
- Selenium IDE: An integrated development environment for recording and playback of test scripts.
- Selenium WebDriver: A powerful tool for automating web browsers, offering a rich set of APIs for interacting with web elements.
- Selenium Grid: A distributed testing framework that enables parallel execution of tests across multiple machines and browsers.
- Selenium Remote Control (RC): A deprecated tool for executing test scripts across different browsers and operating systems.
In the subsequent sections, we’ll explore the intricacies of using Selenium with Java and how this combination can streamline your web application testing process.
Selenium is compatible with various browsers including Chrome, Safari, Firefox, Mozilla, and others. Additionally, it supports multiple programming languages for scripting Selenium tests such as Ruby, Python, Java, C#, and more.
Among these options, Java stands out as the most commonly utilized programming language for scripting Selenium tests. But why is Java the preferred choice?
The synergy between Selenium and Java creates an ideal environment for running automated tests across different web browsers. Professionals who work with Selenium regularly tend to favor Java for several reasons:
- Java boasts a vast network of active software developers who contribute extensively to writing test cases. This not only fosters growth within the Java community but also benefits Selenium testers.
- Java offers faster program execution compared to other programming languages.
- Java enjoys widespread adoption, making it easier to integrate Selenium tests with Java due to its popularity.
Now, let’s delve into the steps required to start using Selenium with Java bindings. This section will provide a comprehensive guide on setting up and executing tests using Selenium with Java.
Automation testing requires several essential components to be in place. Here are the key steps for setting up two crucial components:
• Java Installation:
The fundamental requirement for writing and executing Java programs is the Java Development Kit (JDK), which encompasses the Java Runtime Environment (JRE). To install Java:
- Download the JDK.
- Install it on your system.
- Set the environment path.
Once installed, you can verify by opening the command prompt and typing java -version. If Java is installed correctly, it will display the installed version.
• Eclipse Installation:
For a development platform where developers can write and execute their code, Eclipse serves as an indispensable Integrated Development Environment (IDE). Follow these steps to install Eclipse:
- Visit the official Eclipse website and download the software.
- Extract the downloaded files.
- Look for the eclipse.exe icon in the Eclipse folder.
To launch Eclipse, simply open the eclipse.exe file. This user-friendly IDE is widely acclaimed among Java developers worldwide.
• Selenium Client and WebDriver Language Bindings:
Selenium WebDriver supports multiple programming languages, each requiring its specific client driver. For Java, the essential component is the ‘Selenium Java Client Driver’.
Here’s a basic example demonstrating the setup of Selenium Client and WebDriver Language Bindings in Java:
import org.openqa.selenium.WebDriver;
import org.openqa.selenium.chrome.ChromeDriver;
public class SeleniumSetupExample {
public static void main(String[] args) {
// Set the path to ChromeDriver executable
System.setProperty(“webdriver.chrome.driver”, “path_to_chromedriver_executable”);
// Initialize ChromeDriver
WebDriver driver = new ChromeDriver();
// Open a website
driver.get(“https://www.example.com”);
// Print the title of the page
System.out.println(“Page title is: ” + driver.getTitle());
// Close the browser
driver.quit();
}
}
In this example, we set the system property to specify the path to the ChromeDriver executable. Then, we initialize a ChromeDriver instance. Next, we use the get() method to open a website (in this case, “https://www.example.com“). We print the title of the page using getTitle() method, and finally, we close the browser using quit() method. Make sure to replace "path_to_chromedriver_executable" with the actual path to your ChromeDriver executable.
• Configuration of Selenium WebDriver with Eclipse:
Configuring Selenium WebDriver with Eclipse is a crucial initial step. Follow these steps:
- Launch Eclipse by double-clicking on the eclipse.exe file.
- Create a workspace.
- Create a new Java project by navigating to File -> New -> Java Project.
- Once the project is created, right-click on it and create a package: New -> Package.
- Within the package, create a new class: New -> Class.
Here’s the code for a simple Selenium test class that you can create within Eclipse:
import org.openqa.selenium.WebDriver;
import org.openqa.selenium.chrome.ChromeDriver;
public class SeleniumTest {
public static void main(String[] args) {
// Set the path to ChromeDriver executable
System.setProperty(“webdriver.chrome.driver”, “path_to_chromedriver_executable”);
// Initialize ChromeDriver
WebDriver driver = new ChromeDriver();
// Open a website
driver.get(“https://www.example.com”);
// Print the title of the page
System.out.println(“Page title is: ” + driver.getTitle());
// Close the browser
driver.quit();
}
}
Make sure to replace "path_to_chromedriver_executable" with the actual path to your ChromeDriver executable. After creating this class, you need to add the Selenium jar files to the project build path. To do this, right-click on the project folder, select Properties, navigate to “Java Build Path”, click on “Add External JARs”, add the downloaded Selenium jar files, and click “Apply and Close”. Now, Eclipse is configured to execute Selenium test scripts.
• First Test Using Selenium with Java: To perform your initial test with Selenium and Java, follow these steps along with an example.
import org.openqa.selenium.WebDriver;
import org.openqa.selenium.chrome.ChromeDriver;
public class FirstSeleniumTest {
public static void main(String[] args) {
// Set the path to ChromeDriver executable
System.setProperty(“webdriver.chrome.driver”, “path_to_chromedriver_executable”);
// Initialize ChromeDriver
WebDriver driver = new ChromeDriver();
// Open a website
driver.get(“https://www.example.com”);
// Print the title of the page
System.out.println(“Page title is: ” + driver.getTitle());
// Close the browser
driver.quit();
}
}
In this example, we first set the system property to specify the path to the ChromeDriver executable. Then, we initialize a ChromeDriver instance. Next, we use the get() method to open a website (in this case, “https://www.example.com“). We print the title of the page using getTitle() method, and finally, we close the browser using quit() method. Make sure to replace "path_to_chromedriver_executable" with the actual path to your ChromeDriver executable.
Key Considerations for Writing Selenium Tests with Java
When crafting Selenium tests with Java, it’s crucial to keep several key aspects in mind:
• Utilize the Right Selenium Locators: Employing accurate Selenium locators enhances reliability and boosts test execution speed.
• Implement a Data-Driven Framework: Utilize a data-driven framework to execute Selenium tests efficiently, allowing for easy parameterization and scalability.
• Set Specific Halt Times: Providing appropriate wait times within the test script prevents premature failures and ensures smoother test execution.
• Assert Test Cases: Utilize assertion mechanisms from frameworks like JUnit and TestNG to validate expected outcomes, ensuring the robustness of your test cases.
• Capture Screenshots and Generate Reports: Take screenshots and generate comprehensive reports to provide tangible evidence of testing outcomes, aiding in communication between testers and developers.
In Conclusion
Java emerges as the preferred programming language for Selenium due to its versatility and robustness. Throughout this article, you’ve gained insight into the fundamentals of Selenium and its integration with Java. Moreover, we’ve explored a practical demonstration of incorporating Selenium with Java, culminating in executing our inaugural Selenium test script within Eclipse.
Feeling inspired by this blog to embark on your Selenium journey? Don’t hesitate any longer! Your adventure with Selenium is just getting started, and you’ll discover ample resources and support to guide you toward expertise. Consider joining IgnisysIT for further assistance on your path to mastering Testing Tools Trainings.
Leave a Reply