The Testing Evolution: Navigating Selenium and Its Modern Alternatives

Introduction: In the ever-evolving world of software testing, Selenium has stood as a stalwart tool for automating web applications. However, as technology advances and testing needs become more diverse, exploring Selenium alternatives has become a topic of interest. In this extensive guide, we’ll delve into the intricacies of Selenium, its key benefits, the reasons behind the quest for alternatives, and explore a range of viable options available in the testing toolkit.

Table of Contents:

1. Understanding Selenium: Selenium is an open-source framework that empowers testers and developers to automate web application testing across multiple browsers and platforms. It provides a suite of tools and libraries that facilitate the automation of browser actions and interactions.

2. Key Benefits of Selenium:

  • Cross-Browser Compatibility: Selenium’s ability to execute tests across various browsers ensures that applications function as intended on all major platforms.
  • Multi-Language Support: Support for multiple programming languages like Java, Python, C#, and more, allows developers to work with their preferred language.
  • Flexibility and Customization: Selenium offers the flexibility to design custom test frameworks tailored to project-specific requirements.
  • Broad Community Support: Selenium boasts a vast community of users, developers, and experts, which translates to extensive documentation, tutorials, and support resources.
  • Continuous Integration: Integration with CI/CD pipelines streamlines testing and ensures consistent feedback throughout the development process.

3. Reasons for Seeking Selenium Alternatives:

  • Complex Setup and Maintenance: Selenium’s setup and configuration, especially for beginners, can be challenging and time-consuming.
  • Limited Mobile Testing: Selenium’s primary focus is web testing, leaving a gap in mobile application automation.
  • Speed and Performance: While Selenium is powerful, executing tests on multiple browsers can lead to slower execution times.
  • Dynamic Web Applications: Testing dynamic web pages with ever-changing elements can be complex and prone to errors with Selenium.
  • Licensing Costs: For commercial projects, the costs associated with cloud-based Selenium Grid services can add up.

4. Selenium Alternatives:

  • Appium: Appium extends Selenium’s capabilities to mobile applications, supporting native, hybrid, and mobile web applications.
  • Cypress: Known for its speed and real-time reloads, Cypress offers an entirely different approach to end-to-end testing with a focus on JavaScript.
  • TestCafe: TestCafe provides automated web testing without the need for browser plugins, focusing on effortless cross-browser testing.
  • Playwright: Introduced by Microsoft, Playwright offers a unified API for web automation across multiple browsers, addressing challenges like speed and reliability.
  • WebdriverIO: Built on top of WebDriver, WebdriverIO simplifies web and mobile automation, emphasizing ease of use and seamless integration with modern tools.
  • Katalon Studio: A comprehensive solution offering automated testing, Katalon Studio is user-friendly and supports both web and mobile applications.

5. Comparative Analysis of Alternatives:

  • Language Support and Learning Curve: Comparing language support and the learning curve associated with each alternative.
  • Mobile Testing Capabilities: Evaluating the mobile testing features of alternatives like Appium and Playwright.
  • Performance and Speed: Analyzing the execution speed and performance benefits of alternatives like Cypress and TestCafe.
  • Ecosystem and Community: Exploring the community size, documentation, and available resources for each alternative.

6. Factors to Consider When Choosing an Alternative:

  • Project Requirements: The nature of your application, whether web or mobile, and the platforms it targets.
  • Team Skillset: Leveraging the skills and expertise of your development and testing teams.
  • Integration with CI/CD: Ensuring smooth integration with your existing CI/CD pipelines.
  • Long-Term Viability: Considering the community support and the ongoing development of the chosen alternative.

7. Conclusion: As the testing landscape evolves, so do the tools at our disposal. While Selenium remains a robust choice for web testing, exploring alternatives like Appium, Cypress, TestCafe, Playwright, WebdriverIO, and Katalon Studio can open new avenues for addressing specific testing needs. By carefully evaluating the benefits, drawbacks, and alignment with project requirements, testers can make informed decisions that enhance the testing process and contribute to the overall quality of software applications.

Unveiling File-Based Data Import (FBDI) in Oracle Fusion: A Comprehensive Step-by-Step Guide to Create an FBDI Template

Introduction: File-Based Data Import (FBDI) is a powerful feature within Oracle Fusion Applications that facilitates seamless data loading and integration. In this comprehensive guide, we’ll delve into what FBDI is and walk you through the step-by-step process of creating an FBDI template using Oracle Fusion.

File-Based Data Import (FBDI) Process: File-Based Data Import (FBDI) is a data loading method in Oracle Fusion Applications that allows you to import and load data from external files into your Fusion application. This process is commonly used to import large volumes of data into various modules of Oracle Fusion, such as Human Capital Management (HCM), Supply Chain Management (SCM), and more. FBDI enables you to upload data in predefined file formats (like CSV, Excel, or XML) and then integrate that data into your Fusion application’s database.

Benefits of FBDI:

  1. Efficiency: FBDI streamlines the process of importing large volumes of data. It’s particularly useful when dealing with complex data structures or when you need to update a significant amount of information.
  2. Data Accuracy: FBDI allows you to prepare data in external files using familiar tools like spreadsheets. This reduces manual data entry errors and enhances data accuracy during the import process.
  3. Bulk Data Import: FBDI supports bulk data import, making it well-suited for scenarios where you need to load a substantial amount of data into your Oracle Fusion application.
  4. Flexibility: You can work with data in different formats (CSV, Excel, XML), choose specific data segments to import, and map external data fields to Fusion application fields.
  5. Automation: Once you’ve defined your FBDI templates and processes, you can automate data imports by scheduling them to run at specific times. This saves time and reduces the need for manual intervention.
  6. Integration: FBDI supports integration with various Oracle Fusion modules, allowing you to seamlessly update and synchronize data across different parts of your application.
  7. Audit Trail: FBDI provides logs and error reports that allow you to track the success of data imports and identify any issues that need to be addressed.
  8. Scalability: Whether you’re importing a few records or thousands, FBDI is designed to handle varying data volumes while maintaining performance.
  9. Compliance: FBDI helps maintain data compliance and governance by ensuring data consistency and accuracy during the import process.
  10. User-Friendly: The ability to use commonly used tools like spreadsheets for data preparation makes the FBDI process user-friendly and accessible to a wider range of users.

In summary, the File-Based Data Import (FBDI) process in Oracle Fusion provides a structured and efficient way to import data from external files into your Fusion application. Its benefits include enhanced efficiency, accuracy, automation, and scalability, making it a valuable tool for data management and integration within Oracle Fusion environments.

Step-by-Step Guide to Create an FBDI Template:

Step 1: Access the FBDI Tool:

  1. Log in to your Oracle Fusion Applications instance.
  2. Navigate to the “Navigator” menu.
  3. Under “Tools,” locate and select “File-Based Data Import.”

Step 2: Create a New Template:

  1. Within the “File-Based Data Import” window, click the “Create” button.
  2. Choose the appropriate data object for your template (e.g., “Supplier,” “Employee,” “Item”).
  3. Define template parameters such as the business unit, data set, and other relevant criteria.

Step 3: Define Template Mapping:

  1. After template creation, click on “Manage Templates.”
  2. Download the FBDI spreadsheet template by clicking the “Download” button.
  3. Open the downloaded spreadsheet and populate the necessary data using the predefined columns.
  4. Save the spreadsheet to your local machine.

Step 4: Upload Data File:

  1. Return to the “File-Based Data Import” window.
  2. Click the “Upload” button and select the populated spreadsheet file.
  3. The system will validate the file and initiate the data import process.

Step 5: Monitor Import Progress:

  1. To monitor the import progress, click on the “Monitor File-Based Data Import” link.
  2. Track the status of the import, including any errors or warnings.

Step 6: Review and Correct Errors:

  1. In case of errors or warnings, access the “Review File-Based Data Import” page.
  2. Identify the records with issues and review the error details.
  3. Correct the erroneous data in the spreadsheet and re-upload the file if necessary.

Step 7: Complete Data Import:

  1. Once errors are resolved, return to the “Monitor File-Based Data Import” page.
  2. Verify that all records have been successfully processed without errors.
  3. Confirm the completion of the data import process.

Conclusion: File-Based Data Import (FBDI) is a game-changer for organizations seeking a streamlined approach to data loading in Oracle Fusion Applications. By following this comprehensive guide, you can confidently create FBDI templates, upload data, and monitor the import process. FBDI empowers users to efficiently manage data integration, enhancing the agility and accuracy of your Oracle Fusion environment.

Title: Demystifying FBDI in Oracle Fusion: A Step-by-Step Guide

Introduction: File-Based Data Import (FBDI) is a powerful feature in Oracle Fusion Applications that simplifies and accelerates data loading processes. In this comprehensive guide, we’ll walk you through the steps to create an FBDI template and perform data import, complete with screenshots of key windows to ensure a successful implementation.

Step 1: Navigate to the File-Based Data Import Tool:

  1. Log in to your Oracle Fusion Applications instance.
  2. Navigate to the Navigator menu and select “Tools.”
  3. Under “Integrations,” click on “File-Based Data Import.”

Step 2: Create an FBDI Template:

  1. Click the “Create” button to initiate a new FBDI template.
  2. Choose the relevant object (e.g., “Supplier,” “Employee,” “Item”) for which you want to create the template.
  3. Define the template parameters, such as business unit, data set, and other criteria.

Step 3: Define Template Mapping:

  1. After creating the template, click on “Manage Templates” to access the template details.
  2. Click the “Download” button to obtain the FBDI spreadsheet template.
  3. Open the spreadsheet and populate the necessary data based on the predefined columns.
  4. Save the spreadsheet locally.

Step 4: Upload Data File:

  1. Return to the “File-Based Data Import” window.
  2. Click the “Upload” button and select the populated spreadsheet file.
  3. Validate and upload the file.

Step 5: Monitor Data Import Progress:

  1. Once the file is uploaded, the system will process the data.
  2. Monitor the progress by clicking on the “Monitor File-Based Data Import” link.
  3. Review the import status, errors, and warnings.

Step 6: Review and Correct Errors:

  1. If errors or warnings are identified during the import process, navigate to the “Review File-Based Data Import” page.
  2. Identify the records with issues and review error details.
  3. Make necessary corrections in the spreadsheet and re-upload the file if required.

Step 7: Complete Data Import:

  1. Once all errors are resolved, return to the “Monitor File-Based Data Import” page.
  2. Verify that all records have been processed successfully without errors.
  3. Confirm the completion of the data import process.

Conclusion: File-Based Data Import (FBDI) is a valuable tool within Oracle Fusion Applications that empowers users to efficiently import and manage data. By following this step-by-step guide and utilizing the provided screenshots, you can confidently create FBDI templates, upload data, and monitor the import process, ensuring accurate and streamlined data loading for your Fusion environment.

Ready to elevate your career in Oracle Fusion? Enroll for Oracle Fusion Technical Training from IgnisysIT to acquire the in-demand skills that industry leaders seek. Connect with us now to secure your spot and fast-track your professional journey!

A Step-by-Step Guide to Creating a Login Page in ReactJS

Introduction:

The login page is a fundamental element of any web application, providing users with secure access to their accounts. In this blog post, we’ll walk you through the process of building a login page using ReactJS. By the end of this guide, you’ll have a clear understanding of how to implement user authentication with a practical example.

Prerequisites

Before we start, ensure you have the following prerequisites in place:

  1. Basic understanding of ReactJS and JavaScript.
  2. Node.js and npm (Node Package Manager) installed on your machine.
  3. A code editor of your choice.

Step 1: Setting Up the Project

Begin by creating a new React application. Open your terminal and run the following commands:

npx create-react-app login-page

cd login-page

This will set up a new React project named “login-page.”


Step 2: Creating the Login Form

In the src folder of your project, locate the App.js file. Replace its contents with the following code:

import React, { useState } from ‘react’;

import ‘./App.css’;

function App() {

  const [username, setUsername] = useState(”);

  const [password, setPassword] = useState(”);

  const handleLogin = () => {

    // Perform login logic here

  };

  return (

    <div className=”App”>

      <h1>Login Page</h1>

      <form>

        <input

          type=”text”

          placeholder=”Username”

          value={username}

          onChange={(e) => setUsername(e.target.value)}

        />

        <input

          type=”password”

          placeholder=”Password”

          value={password}

          onChange={(e) => setPassword(e.target.value)}

        />

        <button type=”button” onClick={handleLogin}>

          Login

        </button>

      </form>

    </div>

  );

}

export default App;

Step 3: Implementing Login Logic

In the handleLogin function within App.js, you would typically connect to a backend server for authentication. For this example, let’s simulate a successful login by checking hardcoded values:

const handleLogin = () => {

  if (username === ‘user’ && password === ‘password’) {

    alert(‘Login successful!’);

  } else {

    alert(‘Login failed. Please check your credentials.’);

  }

};

Step 4: Styling the Login Page

Style your login page by editing the App.css file:

.App {

  text-align: center;

  margin-top: 10vh;

}

form {

  display: flex;

  flex-direction: column;

  gap: 10px;

  margin-top: 20px;

}

input {

  padding: 8px;

  border: 1px solid #ccc;

  border-radius: 4px;

}

button {

  padding: 10px;

  background-color: #007bff;

  color: white;

  border: none;

  border-radius: 4px;

  cursor: pointer;

}

Conclusion

Congratulations! You’ve successfully created a basic login page in ReactJS. This guide covers the essentials of building a login form, handling user input, and simulating login logic. As you delve deeper into ReactJS, you can integrate more advanced authentication methods and connect to real backend services for secure user authentication.

Understanding REST API and SOAP: A Comprehensive Comparison

In the world of web development and software integration, two widely used communication protocols stand out: REST API and SOAP. These protocols enable applications to communicate with each other over the internet, facilitating data exchange and functionality sharing. In this blog, we will delve into the concepts of REST API and SOAP, exploring their differences, benefits, and use cases.

What is a REST API?

REST (Representational State Transfer) is an architectural style for designing networked applications. REST APIs provide a way for different software applications to communicate with each other using standard HTTP methods. These methods include GET (retrieve data), POST (create new data), PUT (update existing data), and DELETE (remove data).

Key features of REST API:

  1. Stateless: Each request from a client to the server must contain all the necessary information for the server to understand and process the request. The server doesn’t store any client context between requests.
  2. Resources: REST APIs expose resources, which are identified by URLs (Uniform Resource Locators). These resources can be manipulated using standard HTTP methods.
  3. Representation: Data exchanged between client and server is typically in JSON or XML format, allowing for flexibility and compatibility.
  4. Caching: REST APIs can utilize caching mechanisms to improve performance by storing responses for commonly requested resources.

What is SOAP?

SOAP (Simple Object Access Protocol) is a protocol for exchanging structured information in the implementation of web services. It relies on XML to define message structure and relies on various application-layer protocols to transport messages.

Key features of SOAP:

  1. Message Structure: SOAP messages are structured using XML, allowing for complex data types and custom structures.
  2. Protocol Agnostic: SOAP messages can be transported over various protocols, including HTTP, SMTP, and more.
  3. Stateful: SOAP maintains the state of the application between requests, which can be beneficial for certain use cases but may lead to more complex implementations.
  4. Security: SOAP has built-in security features like WS-Security, which enable encryption and authentication of messages.

REST API vs. SOAP: A Detailed Comparison

AspectREST APISOAP
Architectural StyleRepresentational State TransferSimple Object Access Protocol
Message FormatJSON or XMLXML
CommunicationUses standard HTTP methods (GET, POST, etc.)Uses XML-based messaging protocol
State ManagementStatelessStateful (maintains application state)
ComplexitySimpler, easy to implementMore complex, requires detailed specifications
FlexibilityLightweight, suitable for mobile and webSuited for enterprise-level applications
PerformanceGenerally faster due to lightweight natureMay have higher overhead due to XML parsing
CachingSupports caching for improved performanceCaching requires more configuration
SecurityRelies on underlying transport securityBuilt-in security features (WS-Security)
Error HandlingUses standard HTTP status codesDetailed fault codes and error handling
ScalabilityHighly scalableMay require additional measures for scaling
Use CasesMobile apps, web apps, APIs for external appsEnterprise-level applications, legacy systems

Conclusion

In the realm of web services, both REST API and SOAP play crucial roles in enabling communication between applications. While REST API offers simplicity, speed, and compatibility with modern web and mobile applications, SOAP provides a robust solution with built-in security features and advanced data structure support. The choice between REST API and SOAP largely depends on your project’s requirements, security considerations, and existing infrastructure. By understanding the strengths and weaknesses of each approach, you can make an informed decision that aligns with your development goals.

Undoing Mistakes with Git Revert Commit: A Comprehensive Guide

In the world of version control, Git is a powerful tool that enables developers to track changes, collaborate efficiently, and maintain a history of their codebase. However, there are times when you need to undo or revert changes, whether it’s a commit that introduced bugs or a change that no longer aligns with your project’s goals. In this blog post, we’ll delve into the concept of reverting changes in Git, specifically focusing on how to revert a commit. We’ll provide you with step-by-step instructions and examples to guide you through the process.

Understanding the Need for Reverting Changes

Before we jump into the “how,” let’s briefly discuss the “why.” Reverting changes in Git serves several purposes:

  1. Fixing Mistakes: Sometimes, a commit might introduce unintended bugs or errors. Reverting the problematic commit allows you to quickly undo those changes.
  2. Rolling Back: If you realize that a particular commit has taken your project in the wrong direction, you can roll back to a previous state.
  3. Temporary Undoing: You might need to temporarily remove a commit to test or experiment with something else without losing your original changes.

What Is Git Revert?

Git revert is a command in the Git version control system that allows you to create a new commit that undoes the changes introduced by a specific commit. It’s a way to effectively roll back changes without actually removing the commit from the commit history. Git revert is particularly useful when you want to maintain a clear and accurate history of your codebase while addressing issues introduced by a particular commit.

How Does Git Revert Work?

When you use the git revert command, Git analyzes the changes introduced by the specified commit and creates a new commit that essentially undoes those changes. This new commit is added on top of the commit history, and its content is the opposite of the changes made in the commit you’re reverting.

For example, if the original commit added a line of code, the revert commit will remove that line. If the original commit deleted a file, the revert commit will add that file back. This process ensures that the codebase returns to a state that matches the state prior to the commit being reverted.

Git does not remove the original commit; instead, it adds a new commit that effectively “cancels out” the changes from that commit. This is why using git revert is a safer option compared to other methods like git reset, especially in collaborative environments where commit history preservation is important.

Resetting vs. Reverting

While both resetting and reverting can be used to “undo” changes in a Git repository, they serve different purposes and have different implications:

  1. Resetting: The git reset command is used to move the current branch pointer to a specific commit, effectively “rewinding” the commit history. This can be a powerful way to remove commits, but it also has the downside of altering the commit history, which can cause confusion and issues in a collaborative environment.
  2. Reverting: The git revert command, as explained above, creates a new commit that undoes the changes of a specific commit. It preserves the commit history by adding a new commit rather than removing or altering existing commits. This makes it a safer option when collaborating with others or working on a shared codebase.

In summary, git revert is a more controlled approach for undoing changes in a Git repository, ensuring that you can fix issues without disrupting the commit history. It’s a valuable tool in maintaining a clean and accurate version history while addressing problems introduced by specific commits.

Reverting a Commit in Git: Step-by-Step Guide

Here’s how to revert a commit in Git:

Step 1: Identify the Commit to Revert

Use the git log command to view the commit history and identify the commit you want to revert. Note down the commit hash or message.

Step 2: Create a Revert Commit

To create a new commit that reverts the changes introduced by the commit you want to undo, use the git revert command followed by the commit hash:

git revert <commit_hash>

This command creates a new commit that undoes the changes from the specified commit.

Step 3: Review and Resolve Conflicts

In some cases, the changes you’re reverting might conflict with the current state of the codebase. Git will prompt you to resolve these conflicts before the revert commit can be completed.

Step 4: Commit the Revert

After resolving any conflicts, commit the revert changes:

git commit -m “Revert <commit_hash>: Description of the changes being reverted”

This commit message helps you and your team understand the purpose of the revert commit.

Step 5: Push the Changes

If you’re collaborating with others, make sure to push the changes to the remote repository:

git push origin <branch_name>

Examples of Reverting a Commit

Let’s look at a couple of examples:

Example 1: Reverting a Single Commit

Suppose you want to revert a single commit with the hash abc123:

git revert abc123

git commit -m “Revert abc123: Fix unintended bug”

git push origin main

Example 2: Reverting a Merge Commit

If you need to revert a merge commit, use the same process:

git revert def456

git commit -m “Revert def456: Revert merge for feature branch”

git push origin main

Conclusion: Mastering the Git Revert Command

Reverting changes in Git is a valuable skill that empowers you to maintain a clean and functional codebase. Whether you’re fixing mistakes, rolling back to a previous state, or temporarily undoing changes, the git revert command provides an effective solution. By following the steps outlined in this guide and understanding the underlying principles, you can confidently manage your project’s history and maintain its integrity.

AWS DevOps Unleashed: Must-Have Tools for Web Application Development

Introduction:

In the ever-evolving landscape of software development and IT operations, the synergy between DevOps practices and cloud computing platforms has revolutionized the way organizations deploy, manage, and scale their applications. This blog post aims to provide a comprehensive overview of DevOps, AWS (Amazon Web Services), and how they come together to form the powerful paradigm of AWS DevOps. We will explore the concept, architecture, essential tools, and best practices of AWS DevOps.

What is DevOps?

DevOps is a collaborative approach that brings together software development (Dev) and IT operations (Ops) to shorten the development lifecycle, increase the frequency of software releases, and improve the quality of software applications. DevOps emphasizes automation, continuous integration, continuous delivery (CI/CD), and a culture of collaboration among development, operations, and other stakeholders.
What is AWS (Amazon Web Services)?

Amazon Web Services (AWS) is a comprehensive cloud computing platform provided by Amazon. It offers a wide range of cloud services, including computing power, storage, databases, analytics, machine learning, networking, security, and more. AWS enables organizations to deploy applications and services quickly, scale as needed, and only pay for the resources they consume.

What is AWS?

AWS DevOps embodies Amazon’s response to embracing the DevOps philosophy through its cloud ecosystem and dedicated toolkit of services. Echoing their perspective, “AWS presents an array of adaptable services meticulously crafted to empower enterprises in swiftly and dependably constructing and delivering products using both AWS and DevOps methodologies. These services simplify the chore of provisioning and overseeing infrastructure, orchestrating application code deployment, automating software release lifecycles, and scrutinizing application and infrastructure performance.”

AWS DevOps equips teams of application developers with the means to proficiently institute continuous integration and continuous delivery (CI/CD). This facilitates the secure storage and versioning of application source code, with automated processes encompassing building, testing, and ultimate deployment of the application, whether within on-premises environments or onto the AWS cloud.

Within the realm of cloud computing, three principal categories take center stage:

  1. Software as a Service (SaaS)
  2. Platform as a Service (PaaS)
  3. Infrastructure as a Service (IaaS)

AWS finds its place within the IaaS category, representing a scalable, instantly accessible computing infrastructure entirely under the customer’s control. This encompasses virtual servers and operating systems (OSes).

Having gained an introductory understanding of AWS DevOps, let us advance our exploration by delving into the intricate architecture of AWS DevOps.

AWS DevOps Architecture Deconstructed

In order to gain a more comprehensive understanding of the implementation of DevOps within the AWS environment, it’s essential to dissect the foundational architecture. For illustrative purposes, we’ll take AWS EC2 (Elastic Compute Cloud) as our prime example. EC2 serves as the gateway to configuring virtual machines and the underlying resources they tap into, all managed from a central console. The integration of automation empowers IT administrators to dynamically scale resources to match the organization’s requirements, rendering the entire process remarkably pliable and cost-effective.

  1. Load Balancing: A fundamental aspect of most web application architectures, load balancing distributes EC2 traffic across an array of available web server resources. This allocation can be seamlessly adjusted based on fluctuations in traffic demand. The Elastic Load Balancing service provided by AWS automates this process.
  2. Amazon CloudFront: Designed to deliver content, such as websites, including dynamic, streaming, and static content types, CloudFront seamlessly operates in conjunction with other AWS components. Importantly, it’s also compatible with non-AWS cloud environments.
  3. Amazon Security Group: With security concerns paramount, this feature acts as an inbound network firewall. EC2 access is granted only to specified protocols, ports, and source IP ranges, each mapped to authorized traffic streams directed to appropriate EC2 instances.
  4. Elastic Caches: This web service effectively manages cloud memory caching, alleviating service strain by storing frequently accessed data. This optimization significantly bolsters performance and scalability.
  5. Amazon Relational Database Service (RDS): Simplifying the setup, operations, and scalability of cloud-based relational databases, RDS takes on routine database administration tasks. It offers an easily scalable and cost-effective solution for working with databases, supporting Amazon Aurora, MariaDB, Microsoft SQL Server, MySQL, Oracle, and PostgreSQL.
  6. Amazon Simple Storage Service (S3): Two pathways exist for accessing, backing up, and storing web application data and assets in the AWS cloud. S3 provides a user-friendly interface for data management, regardless of volume, accessible from anywhere on the web. Data is stored as objects within buckets, enabling manipulation as needed.
  7. Amazon Elastic Block Store (EBS): Geared toward high-performance block storage, EBS assists in data partitioning and application log management. It’s an optimal choice for swift access and long-term data persistence, particularly suitable for primary storage for databases, file systems, and applications requiring unformatted, raw, block-level storage with granular update capabilities.
  8. Amazon Auto Scaling: This service empowers the creation of capacity groups comprising servers, adjustable on-demand to accommodate fluctuations in resource requirements.

With a thorough exploration of the architectural components complete, the subsequent step is to delve into the diverse toolkit encompassing the realm of AWS DevOps

Conclusion

AWS DevOps represents a powerful synergy between DevOps principles and the capabilities of Amazon Web Services. By leveraging AWS services and tools, organizations can achieve faster development cycles, more frequent releases, and improved software quality. Understanding the architecture, tools, and best practices of AWS DevOps is essential for modern software development and operational success in the cloud era.

Demystifying the Role of a Cybersecurity Consultant: From Responsibilities to Career Path

Table of Contents

What does a cybersecurity consultant do?

 What Is a Cybersecurity Consultant?

The Cybersecurity Consultant’s Roles and Responsibilities

How Do You Become a Cybersecurity Consultant?

What Is the Ideal Cybersecurity Consultant’s Career Path?

 The Benefits of Cybersecurity Consultant Certification

What Does a Cybersecurity Consultant Salary Look Like?

Want to Learn More About Certification?

 Do You Want to Be a Cybersecurity Consultant?

From cybersecurity architects to administrators, analysts, engineers, and even Chief Information Security Officers, the field boasts a diverse array of roles.

But what about cybersecurity consultants? Consulting is a concept familiar to most – these are the experts who traverse the corporate landscape, offering their specialized services to various clients, before moving on to their next professional endeavor.

Unsurprisingly, the cybersecurity domain has also embraced the role of consultants. This article serves as a guide, shedding light on the intricacies of the cybersecurity consultant role. It offers an insight into the responsibilities that come with being a cybersecurity consultant, outlines the path to becoming one, and delves into the rationale behind choosing this avenue as a savvy career move.

Top of Form

Introduction: In today’s digitally interconnected world, the protection of sensitive information and digital assets is paramount. Cybersecurity consultants play a crucial role in safeguarding organizations against cyber threats. But what exactly does a cybersecurity consultant do, and how can you embark on this exciting career path? In this blog, we’ll explore the ins and outs of the role, its responsibilities, the path to becoming a consultant, and the potential benefits it offers.

What Does a Cybersecurity Consultant Do?

A cybersecurity consultant is a professional responsible for ensuring an organization’s digital infrastructure is secure from cyber threats. Their primary goal is to identify vulnerabilities, assess risks, and implement robust security measures. These experts work closely with clients to develop tailored strategies that align with their unique security needs and compliance requirements.

The Cybersecurity Consultant’s Roles and Responsibilities

The responsibilities of a cybersecurity consultant are diverse and multifaceted:

  1. Assessment and Analysis: Consultants conduct thorough assessments of an organization’s IT systems, networks, and applications to identify vulnerabilities and potential weaknesses.
  2. Risk Management: They evaluate the level of risk associated with identified vulnerabilities and provide recommendations for mitigating these risks.
  3. Security Strategy Development: Consultants work collaboratively with clients to develop comprehensive cybersecurity strategies that encompass prevention, detection, and response to cyber threats.
  4. Implementation and Testing: They oversee the implementation of security measures and technologies, and often conduct penetration testing to evaluate the effectiveness of these defenses.
  5. Incident Response: Consultants develop incident response plans to guide organizations in effectively handling and recovering from security breaches.
  6. Education and Training: They may provide training sessions to employees, educating them about best practices for cybersecurity and raising awareness about potential threats.

How Do You Become a Cybersecurity Consultant?

Becoming a cybersecurity consultant typically involves the following steps:

  1. Education: Obtain a bachelor’s degree in a related field such as cybersecurity, computer science, or information technology.
  2. Skill Development: Acquire technical skills in areas like network security, ethical hacking, risk assessment, and security architecture.
  3. Work Experience: Gain practical experience through internships, entry-level positions, or freelance work to build your expertise.
  4. Certification: Obtain relevant certifications such as Certified Information Systems Security Professional (CISSP), Certified Ethical Hacker (CEH), or Certified Information Security Manager (CISM).

The Ideal Cybersecurity Consultant’s Career Path

The career path of a cybersecurity consultant is dynamic and can lead to various roles such as:

  1. Security Analyst: Entry-level position involving monitoring, analyzing, and responding to security threats.
  2. Security Consultant: In-depth consulting role focused on providing cybersecurity recommendations and strategies.
  3. Penetration Tester: Specializing in simulating cyberattacks to identify vulnerabilities.
  4. Chief Information Security Officer (CISO): Leadership role overseeing an organization’s entire security posture.

The Benefits of Cybersecurity Consultant Certification

Certifications not only validate your skills but also enhance your career prospects:

  1. Credibility: Certifications demonstrate your expertise to potential employers and clients.
  2. Skill Enhancement: Certification programs provide up-to-date knowledge and training in rapidly evolving cybersecurity practices.
  3. Career Advancement: Certified professionals often have better opportunities for career growth and higher earning potential.

What Does a Cybersecurity Consultant Salary Look Like?

Salaries for cybersecurity consultants vary based on factors like experience, location, and industry. On average, a cybersecurity consultant’s salary can range from $70,000 to $120,000 per year.

Want to Learn More About Certification?

Investigate certification programs such as CISSP, CEH, and CISM to kick-start your cybersecurity consulting journey.

Do You Want to Be a Cybersecurity Consultant?

Embarking on a career as a cybersecurity consultant can be rewarding, challenging, and impactful. If you’re passionate about technology, problem-solving, and safeguarding digital assets, this might be the ideal path for you.

Conclusion

As the digital landscape continues to evolve, the role of a cybersecurity consultant remains indispensable. By understanding the responsibilities, career path, and benefits associated with this role, you can take confident steps towards becoming a skilled cybersecurity professional. Whether you’re just starting or looking to advance in your career, the realm of cybersecurity consulting offers exciting opportunities to make a significant impact in the digital realm.

Mastering the ALTER Command in SQL: A Deep Dive into Database Evolution

Introduction: In the dynamic world of database management, the ability to modify and adapt your schema is paramount. The ALTER command in SQL emerges as a mighty tool, empowering developers and administrators to seamlessly transform database objects without resorting to drastic measures. In this comprehensive guide, we’ll embark on a journey through the intricacies of the ALTER command, accompanied by a plethora of real-world examples and insightful queries that will empower you to wield this command with confidence.

Unveiling the Power of ALTER: At its core, the ALTER command is the chisel in your SQL toolkit, allowing you to sculpt and reshape your database schema without tearing it down. Whether it’s altering table structure, adding or removing columns, tweaking constraints, or fine-tuning indexes, the ALTER command offers unparalleled flexibility in the realm of database management.

1. Modifying Table Structure: Tables are the bedrock of a relational database, and the ALTER command lets you mold them to your will.

Adding a Column: Suppose you have an “employees” table and need to add a “hire_date” column to capture hiring dates.

ALTER TABLE employees

ADD hire_date DATE;

Modifying a Column: Imagine you’ve realized that the “email” column in your “customers” table should be able to accommodate longer email addresses.

ALTER TABLE customers

MODIFY email VARCHAR(100);

Dropping a Column: If the “order_status” column in your “orders” table has become redundant, you can seamlessly remove it.

ALTER TABLE orders

DROP COLUMN order_status;

2. Renaming Tables: Renaming a table is a breeze with the ALTER command, making your database more intuitive and user-friendly.

ALTER TABLE old_table_name

RENAME TO new_table_name;

3. Adding and Modifying Constraints: Constraints are the guardians of data integrity. The ALTER command empowers you to manage them with finesse.

Adding a Primary Key: Suppose you need to establish a primary key for the “products” table.

ALTER TABLE products

ADD CONSTRAINT pk_products_id PRIMARY KEY (product_id);

Adding a Foreign Key: Enforce referential integrity by adding a foreign key constraint to the “order_items” table.

ALTER TABLE order_items

ADD CONSTRAINT fk_order_items_order_id

FOREIGN KEY (order_id) REFERENCES orders(order_id);

Modifying and Renaming Constraints: As your database evolves, you might need to adapt constraints.

ALTER TABLE order_items

DROP FOREIGN KEY fk_order_items_order_id;

ALTER TABLE order_items

ADD CONSTRAINT fk_order_items_new_order_id

FOREIGN KEY (new_order_id) REFERENCES orders(order_id);

4. Modifying Indexes: Indexes are pivotal for query optimization. The ALTER command offers granular control.

Renaming an Index: Give your index a more meaningful name.

ALTER INDEX idx_product_name

RENAME TO idx_new_product_name;

Rebuilding an Index: Optimize performance by rebuilding an index.

ALTER INDEX idx_product_price

REBUILD;

Conclusion:

A Symphony of Transformation: The ALTER command in SQL is your conductor’s baton, orchestrating harmonious changes within your database ecosystem. With the power to mold tables, constraints, and indexes, the ALTER command ensures your database remains agile and adaptable. Armed with the insights and examples from this guide, you’re ready to embark on your own journey of database evolution, confidently shaping and refining your data structures to meet the dynamic demands of modern business.

The Cloud Dual: Oracle Integration Cloud (OIC) vs. Oracle Cloud Infrastructure (OCI)

Oracle Integration Cloud (OIC) and Oracle Cloud Infrastructure (OCI) are two distinct services offered by Oracle in its cloud computing portfolio. They serve different purposes within the Oracle ecosystem. Here’s a brief overview of each:

  1. Oracle Integration Cloud (OIC): Oracle Integration Cloud (OIC) is a comprehensive integration platform that facilitates the connection of various applications, systems, and technologies. It enables organizations to create, deploy, and manage integrations between cloud-based and on-premises applications. OIC provides a low-code, visual development environment that allows users to design and configure integrations, automate workflows, and orchestrate business processes.

Key Features:

  1. Pre-built adapters for connecting to popular applications and technologies.
  2. Data mapping and transformation capabilities.
  3. Process automation and orchestration.
  4. Monitoring, error handling, and logging functionalities.
  5. Support for application-to-application (A2A) and business-to-business (B2B) integrations.

Use Cases:

  • Integrating Software as a Service (SaaS) applications.
  • Automating business processes.
  • Creating workflows and orchestrations.
  • Streamlining data flows between systems.
  1. Oracle Cloud Infrastructure (OCI): Oracle Cloud Infrastructure (OCI) is a cloud computing platform that provides a set of infrastructure services for building, deploying, and managing various types of applications and workloads. OCI offers computing resources, storage options, networking services, and security features in a scalable and highly available environment. It allows organizations to create, host, and manage their applications and services in the cloud.

Key Features:

  • Virtual machines (Compute) and containers for application hosting.
  • Object storage, block storage, and file storage options.
  • Networking services like Virtual Cloud Networks (VCN) and load balancers.
  • Identity and Access Management (IAM) for secure access control.
  • Database services, including Oracle Database and NoSQL databases.

Use Cases:

  • Hosting applications, websites, and databases in the cloud.
  • Building and deploying custom software solutions.
  • Running analytics and big data workloads.
  • Creating development and test environments.

Comparison between Oracle Integration Cloud (OIC) and Oracle Cloud Infrastructure (OCI) within the context of Oracle Fusion Applications.

AspectOracle Integration Cloud (OIC)Oracle Cloud Infrastructure (OCI)
PurposeIntegration platform for connecting applicationsCloud computing infrastructure services
FunctionalityFacilitates application integration, process automation, and orchestrationProvides computing, storage, and networking resources
IntegrationConnects various applications, cloud services, and on-premises systemsFocuses on infrastructure resources
Use CasesIntegrating SaaS applications, building workflows, automating processesHosting applications, databases, and storage
ConnectivitySupports pre-built adapters for various applications and technologiesOffers networking, compute, and storage options
Data TransformationProvides data mapping, transformation, and transformation functionsFocuses on resource provisioning and management
DevelopmentLow-code development with visual design and configurationInfrastructure provisioning and configuration
Monitoring and ManagementOffers monitoring, error handling, and logging capabilitiesProvides tools for managing infrastructure resources
ScalabilityDesigned for application integration and workflow automationScalable infrastructure for hosting applications
SecurityEnsures data encryption, identity management, and secure connectionsOffers security measures for infrastructure resources
Examples of Usage in FusionIntegrate Fusion Applications with external systems, automate business processesHost Fusion Applications, databases, and middleware

In summary, Oracle Integration Cloud (OIC) focuses on integration and process automation, enabling seamless connectivity between applications and systems. Oracle Cloud Infrastructure (OCI), on the other hand, provides a set of cloud computing resources and services for hosting applications, databases, and other workloads in a secure and scalable environment. Both OIC and OCI are part of Oracle’s cloud offerings and can be used independently or in conjunction to address different aspects of cloud-based operations and business needs.

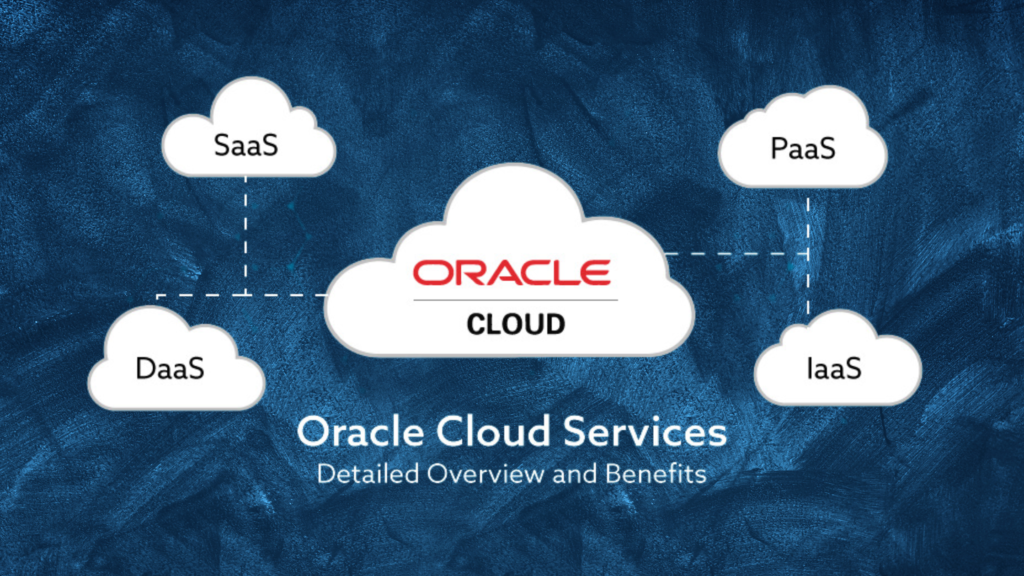
Exploring Oracle Cloud Services: An Overview and Benefits

Introduction

In today’s rapidly evolving technological landscape, cloud computing has revolutionized the way businesses manage their computing needs. Oracle Corporation, a pioneer in the tech industry, offers a comprehensive suite of cloud-based services known as Oracle Cloud. This article provides an in-depth exploration of Oracle Cloud Services, including its key offerings and the advantages it brings to businesses.

Oracle Cloud: An All-Encompassing Solution

Oracle Cloud is a dynamic cloud computing service that encompasses a wide range of offerings, including storage, servers, applications, networking, and more. This suite of services is delivered through a global network of meticulously managed data centers, ensuring reliability, scalability, and security for businesses of all sizes.

Oracle Cloud offers the following core categories of services:

  1. Data as a Service (DaaS): Oracle’s Data as a Service, known as Oracle Data Cloud (ODC), utilizes advanced analytics to aggregate and manage consumer data across multiple channels and devices. It empowers businesses with cross-channel consumer insights, making informed decisions a reality.
  2. Infrastructure as a Service (IaaS): Oracle’s IaaS provides a virtualized computing environment, allowing users to rent virtual machines, storage, and networking components. The flexibility and scalability of IaaS enable organizations to tailor their resources to match their workload demands efficiently.
  3. Software as a Service (SaaS): Through SaaS, Oracle delivers a variety of business applications, such as CRM, ERP, and HCM, over the internet. Users can access and utilize these applications without the hassle of local installation and maintenance.
  4. Platform as a Service (PaaS): Oracle’s PaaS offers a platform for developers to build, deploy, and manage applications without the complexities of infrastructure management. This accelerates development cycles and enhances operational efficiency.

Understanding SaaS, PaaS, IaaS, and DaaS

Software as a Service (SaaS): SaaS delivers software applications over the internet, managed and maintained by third-party providers. Users benefit from seamless upgrades, easy scalability, and global accessibility.

Platform as a Service (PaaS): PaaS provides a development and deployment platform, offering control over applications and configurations. It streamlines provisioning, enhances scalability, and boosts automation for improved development processes.

Infrastructure as a Service (IaaS): IaaS offers virtualized computing resources, including servers and storage, eliminating the need for physical hardware. It facilitates scalability, cost-efficiency, and secure data management.

Data as a Service (DaaS): DaaS leverages consumer data to create cross-channel consumer understanding. With Oracle’s Data Cloud, businesses gain access to extensive company and contact records for accurate and up-to-date insights.

Advantages of Oracle Cloud Services

  1. Cost Savings and Efficiency: Oracle Cloud eliminates the need for upfront hardware investments and simplifies management tasks. It automates processes, resulting in cost savings and increased business efficiency.
  2. Scalability: Organizations can easily scale resources up or down based on demand, ensuring optimal performance without overprovisioning.
  3. Seamless Migration: Oracle Cloud offers a streamlined process for migrating applications, enabling businesses to transition legacy workloads to modern platforms effortlessly.
  4. Future-Proof Solution: Oracle Cloud equips businesses with cutting-edge technologies and supports open standards, ensuring future-readiness and adaptability.
  5. Enhanced Performance: With high-performance computing capabilities and advanced networking features, Oracle Cloud delivers exceptional application performance.
  6. Global Reach: Oracle’s global network of data centers allows businesses to deploy applications closer to their target audience, minimizing latency and enhancing user experience.

Conclusion

Oracle Cloud Services redefine the way businesses approach computing, offering a comprehensive suite of solutions that cater to various needs. Whether it’s SaaS, PaaS, IaaS, or DaaS, Oracle’s offerings provide cost savings, scalability, security, and innovation. By embracing Oracle Cloud, businesses can optimize their operations, enhance their services, and position themselves for success in the digital era.

Frequently Asked Questions (FAQ) – Oracle Cloud Services

  1. What is Oracle cloud services? Oracle Cloud is a cloud computing service offered by Oracle Corporation, providing on-demand storage, network, applications, and servers through a global network of data centers.
  2. What is Oracle field service cloud? Oracle Field Service Cloud is a cloud-based solution that facilitates real-time communication and data collection from the field, allowing businesses to predict and manage events effectively.
  3. What is Oracle managed cloud service? Oracle Managed Cloud Database Service is a fully managed on-premise database cloud solution, offering scalability, performance, and availability.
  4. Which statement best describes Oracle container cloud services? Oracle Application Container Cloud service enables the deployment of various applications, such as Node.js, PHP, Java SE, Python, Go, Ruby, and .NET, to the Oracle Cloud without modification.